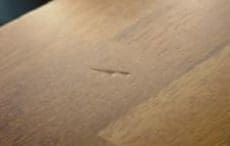
Flooring Wood Pressure Marks
Browse:
STEP 1
STEP 2
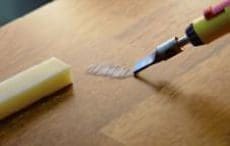
Use the Hot Knife to melt transparent Hard Wax PLUS (900-Light Transparent) and apply to the pressure mark.
STEP 3
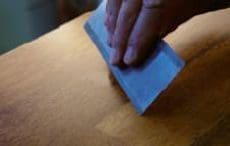
Remove surplus wax by keeping the Special Scraper flush to the surface.
Products required:
STEP 4
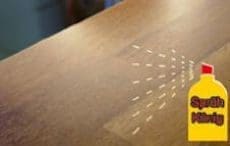
Seal filled damage by misting with Furniture Repair Lacquer from a distance of 12-16 inches – do not spray too wet.
Products required: