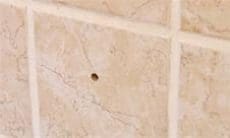
Drill Hole in a Tile
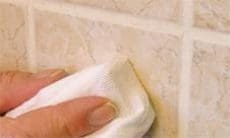
STEP 1
Products required:
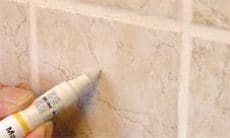
STEP 2
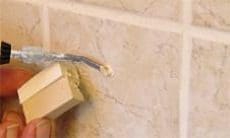
Filling: Use the hot tip of the Hot Knife to apply Ceramic Filler of the matching shade to the damaged area. Always work from light to dark.
To match the right shade, different colors can be intermixed. Clean the tip of the Hot Knife after use.
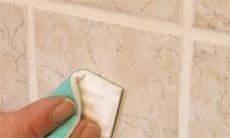
STEP 3
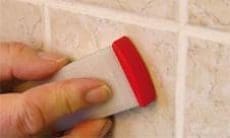
Levelling: Use the Special Filler Applicator to strip off excess material.
Important: Do not use a metallic tool, as this would create metal abrasion and the filled area would turn dark.
Products required:
STEP 4
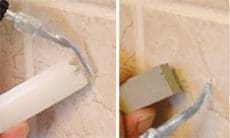
STEP 5
STEP 6
Seal the dry, repaired area with the Brush Pen Clear Lacquer (high-gloss or matt finish). The only exception is for white high-gloss surfaces.
These should be sealed with the relevant highgloss Brush Pen Covering Lacquer (colours can be intermixed).
STEP 7
Gloss Sheen Adjustment: When the sealed area is dry (after approx. 4 hours at room temperature) a final gloss sheen adjustment can be made with the Sanding & Polishing Cloth included with the Special Filler Applicator.
The white side of the cloth reduces the sheen level while the green side polishes.
Products required: